How to Set Up a New Project – Costed BOMs – Part 3


After many years of setting up projects for our industrial designers and mechanical engineers, here are my thoughts on some basic best practices on how to structure your files and keep your project organized.  This segment examines a very useful tool for the engineering and product team:  the costed BOM.

Costed BOM TutorialHere is the transcript of the podcast:

Good morning. My name is Montie Roland. I’m with Montie Design in Morrisville, North Carolina.

And this morning, what’d I’d like to talk about is how to structure your project from a file standpoint, from an organizational standpoint.

Montie Design is a full-service design firm in Morrisville, North Carolina. We provide industrial design, mechanical engineering and prototyping capability on-demand to help you move your project from concept to ready-for-the-shipping-dock.

So, we’ve talked about our Current Design, Released  [directories]. . . let’s go back to Released for a second and talk about reving Assemblies or not to rev assemblies. It’s going to be driven by several things. One is if your design changed dramatically and the assembly doesn’t look like the parts, you need to rev the assembly. Other times you may need to rev the assembly is if you have a vendor that has a PLM system that is tied to the assembly rev. It doesn’t have the flexibility to control it without . . . to make a change to their drawing set without a revised assembly. We’ve seen that. We have a project right now we’re working on; they don’t have that control. So if we make changes we have to revise the assembly just because we revised a part. And the problem is that if you have to do that there may be a lot of subassemblies in-between; so it’s definitely a lot of work to do that.

And so you’re kind of starting to see, as a manager now, why sometimes your engineers are reticent to . . . to do revisions, because there is some work to it.

So other directories that you’ll need – one is that I create a “Project Management” directory. Project Management directory has contracts; has any schedules; things that you need in managing the project, but maybe not necessarily need to execute the design.

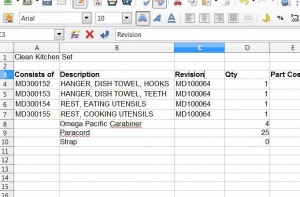
So another thing we would do is that we want to create a Bill of Materials. The Bill of Materials is sooooo handy. As the project goes along, you’re Bill of Materials is going to become a costed Bill of Materials. So at the end of the project, what we want to see is we want to see a . . . a Bill of Materials that has a part number, description, a revision, and has the costing information. Now, dependent on the project there may be some projects where that’s completed handled by the client. For a MontieGear project, one of the last steps is to make sure that Bill of Materials is correct, has the costing information, and then . . . that is used by the person doing the pricing, which often is me for MontieGear. I will take that, and if that Bill of Materials is done correctly, what I can then do is add the cost of labor to do assembly; any shipping costs; and then I know how to price the product without going through and pulling up a bunch of drawings. And this is so important later on. It saves tremendous amount of time.

So, as you go through the project, other directories you’re going to want to have is “Quotes”. So, every time a quote comes in, scan it in; if it’s electronic, save it. Create a directory of Quotes from your vendors in one spot. So, that’s a subdirectory under your Project directory. You’ve got Quotes. So, we’ve done Current Design, Concepts, Quotes. Another one you’ll often have is something called “Files from Client”. And so those are files that the client has provided. These are documentation that where they’ve given you pre-project documentation; there may be initial version of a product specification. And so this is that repository of those documents. Then again, a lot of times we’ll save those file names by date; if it’s a quote we’ll save it by date and vendor name and then possibly, you know, what that is if it’s a single pat quote. So you can quickly scan down that directory and find the quote for the lower left beam, or what have you.

And you may have other directories as needed. Those will depend with projects. One of the other things we do is create an images directory. And then the Images directory, underneath it, we’ll have a description of generally what that image is about. So, it might be /images/first prototype or date-first prototype. Date . . . Proof of Concept; Date-Alpha Prototype; Date-Beta Prototype; Date-Installation. So, that way you can scroll through there and quickly find those images. It’s also a great place if you’re . . . if you’re a manufacturer to also put your . . . your product shots, or your products-in-use. Maybe they’re static images done in the light tent. But that way you’ve got a great way to . . . to go find that because it’s tied to the project.

So this Project directly, theoretically, if you were to just copy that to a flash drive, it would have everything you need to continue with that project. And that’s good because over time hard drives change, files get deleted, directories get changed. So if you encapsulate everything in that subdirectory, then that makes life a lot easier.

So, kind of to roll back through this, we’ve got parametric files and we’ve got non-parametric files. And then we’ve got files that are often edited. And so, the parametric files are Solid Works files that could be inventor; it could be Pro-E. But those are files that need to be kept together; need to be moved using a Pack and Go. And occasionally with your current design, one way to make sure you’ve got the correct files in there is to Pack and Go to a temporary directory; delete the files in Current Design; and then copy those back in. And that way you know you don’t have some superfluous files in there.

Other files that we’ll create and need to do something with are . . . are non-parametric files. So, these could be IGES, STEP, DXF, DWG. And these files, in the Release directory, it will have the parametric files, plus a PDF of each drawing and maybe a DXF or DWG, if that’s needed to do a cutting process, a 2-D cutting process, like water jet, or sometimes a machine shop if they’re working from a 2-D file.

Also have the 3-D non-parametric files, like STEP or IGES. And so that way, in that Release directory, you’ve got the CAD files, plus you’ve the file you’re going to send out to vendors, the non-parametric files. And probably this would be a good spot for your Bill of Materials for that Rev. And so, in this case, a lot of these files follow the same format. Its part number . . . for us, at least, its “part number – description_rev “ and then the two-digit revision code. So, 00 or 02. And so we do this to keep these file names consistent so they’re easy to read through quickly. And that way everything is . . . you get to . . . you can very quickly figure out what you’re looking for. If you don’t maintain control over file names, you end up with file names that mean something to one person today, but may mean nothing to someone later. And, six months’ from now, may not mean anything to the person who named it then. So, I think it’s very important to maintain that . . . that control; have a strict doctrine over that.

That Bill of Materials? It’s important for costing purposes if you’re a manufacturer, because that way you’re engineer is taking what they’ve learned when they went out for quotes, or the purchasing agents wouldn’t . . . so, whoever went out for those quotes enters that into your Bill of Material, so now you can do your pricing quickly without having to go look for a bunch of information which may be harder to find.

Also, storing those quotes is valuable because then that . . . because then you’ve got a way to address that quickly, there again, without having to go look through emails or . . . look wherever [other places on the server].

So, from a hundred thousand foot view, what we want to do is we want this project directly . . . directory to provide everything you need to pick up that project, modify that project, price that product, or deliver to a client. And if you can do that then that helps multiple phases of the organization; not just engineering or industrial design, but also purchasing; it’s great for a reference later, for sales and marketing, because they understand what’s driving the cost; and it’s just a win-win all the way around. And that . . . that’s important to main . . . there again, to maintain that discipline because it’s not only helping you in the engineering stage; like I said, you’ll reap benefits for . . . the life of the product, especially if you ever have to go back and make a change or you ever have to go back and re-price or pricing on components change. It’s a great tool. And having that in a standard format is . . . it just benefits you.

If you have any questions about this, please don’t hesitate to give me a call. I know it’s kind of a long section here and technical, but happy to entertain your calls, questions. It’s 1-800-722-7987. That’s Montie Roland. Email – montie (M-O-N-T-I-E)@montie(M-O-N-T-I-E).com. Or you can visit our website – www.montie.com. You can see the results of client work we’ve done at the montie.com website. Or you can see some of our projects that we’ve done for ourselves at montiegear (M-O-N-T-I-E-G-E-A-R).com.

I hope this has been beneficial. Montie Roland, signing out.

How to Set Up a New Project – Pack and Go’s – Part 2

After many years of setting up projects for our industrial designers and mechanical engineers, here are my thoughts on some basic best practices on how to structure your files and keep your project organized.  We’ll concentrate on the importance of Pack-and-Go’s in this segment.  This is a very important set of practices that will help keep you out of trouble.  These concepts are important even if you have a PLM system, because it helps you understand how the PLM helps keep you organized.


Solidworks Pack and Go for TutorialHere is the transcript:

Good morning. My name is Montie Roland. I’m with Montie Design in Morrisville, North Carolina.

And this morning what’d I’d like to talk about is how to structure your project from a file standpoint, from an organizational standpoint.

Montie Design is a full-service design firm in Morrisville, North Carolina. We provide industrial design, mechanical engineering and prototyping capability on-demand to help you move your project from concept to ready-for-the-shipping-dock.

The Concept directories are where you’ll store your sketches, your ideations, maybe your solid model concepts, pictures for your style board. So then, when you think about these files we’re starting to store, you really have two types of files. One type of file is parametric, and the other type of file is static. And then really . . . I guess a third file would be like a . . . a file that’s directly editable. When it comes to Cat files, though, we have two types.

So, parametric files are files that are linked or potentially linked to other files. This is very, very important to keep in mind. So, with Solid Works, we can save a non-parametric file to a format like STEP or DXF or IGES or DWG or PDF. These non-parametric files can be edited, like, easily in the case of DXF or DWG; less easily in the case of PDF. And so these files, though, are generally not going to change just because you changed something somewhere else in the Solid Works model. However, the Solid Works files from Solid Works are parametrically linked in many cases. So, for example, a drawing file is going to go reference the part file to rebuild the drawing. So, if the part file is missing, it can’t reference it and can’t rebuild drawing and get a, basically, a blank screen in the middle of your . . . your drawing. So this is very, very important to keep in mind. Whenever you move files from one directory to the other (and occasionally you need to do this anyway), you run the risk of orphaning a file that’s somewhere else. So a good example of this is . . . let’s say I’m working on (in Solid Works) and I got to McMaster Car and I download a screw (which is a great way to get a screw). So, I download that screw and then I open it up; it comes across as a STEP or an IGES, and then I import it into my model. And when I hit “save” that McMaster Car Screw was saved to my download directory on my local machine. So, if I don’t consciously save that to my Current Design file . . . Current Design directory on the server, then . . . or on the Z-drive, then what’s going to happen is that now I have files in two different places. So, if I was to go and grab Current Design and move it into Release, let’s say. Just copy it over. I would leave that screw behind. Because the copy tool in Windows Explorer does not know about the relationships in Solid Works. So, it doesn’t know to go grab that.

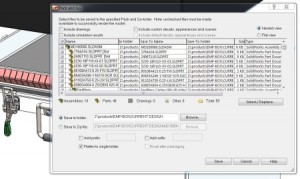
Solid Works has this wonderful utility called “Pack and Go”. Pack and Go finds every file that’s linked to the files that you have open. So, what you want to do is go to the top level of, let’s say, Drawing. Or top-level Assembly. Open up Pack and Go, and then it’ll give you some options. And, generally, you want to exercise all those options in terms of including drawings, including . . . textures, including decals, FEA results; grabbing all that’s good – that way you don’t leave something behind. Solid Works will go look for those files, make a list of them, let you see that list, and then you pick a location where you either want to save that as a zip file, or you want to save that . . . just to that directory; drop the files in that directory. So, you choose that directory and then you hit “Okay”. Then Solid Works will think, and then it will start grabbing files and copying them to that directory. If you do not do this, it will bite you. It is not a question of if it will bite, it’s a question of what moment, what day, and how bad. Because we’ve seen this before. You can imagine that if you have files on a local machine and you just copy them over, or you copy them between places on the Z-drive or what have you, and you orphan some of these files, it can be very painful to find those, get those back. And then you’re never really sure you have the right one. So, let’s say you orphan a single screw. Okay. Worse case, you go download it from McMaster again. But let’s say that you have somehow ended up with a part file that’s in an unknown Rev (or even if we know what the Rev should be) and maybe it’s in some directory. It can very easily happen that you inadvertently saved it to the wrong directory. So, maybe you’re working in Current Design but you’re using a file from Rev 02. But that file is actually Rev 07. So, you grab the stuff out of Current Design, move it to Rev 08. You missed the Rev 07 file. Well, now, all of a sudden, we’ve got no clue where to find that file. And it’s difficult to find without pulling up every single file in . . . on the . . . in the subdirectory on the Z-drive and on your machine, and try to figure out which one it is. And even then, we’ve got to go by the Revision number and properties. And that’s just painful because that still doesn’t tell us it’s the right one. Because there could be, like, a 7 there and an 07 here and which one’s the correct one.

If you do Pack and Go, you avoid soooooo much of that trouble. It’s . . . Pack and Go is your friend. I just . . . this is one of those things that’s important to emphasize.

So, a similar thing applies to other programs. For example, PowerPoint has a Pack and Go feature; use it. Grab all of these images, put them in a Pack and Go file, because that . . . most of the time when you’re working on projects, you end up with images in different subdirectories. It’s on a local machine. It’s on a . . . it’s on your network. But if you do Pack and Go it grabs all those and puts them in the same space. Yes, you use more disk space. I’ll argue that disk space is dirt cheap compared to a few hours of looking for a file you can’t find ten minutes before your deadline.

The same goes for . . . you know, you’re working in an Adobe product. If you have the option to embed it in the file rather than link to it – embed it in the file. I realize this can make your . . . catalog a gigabyte in size. But, it’s so much better than two months’ later pulling it up and missing files. There again, disk space is cheap; time’s not. So, embed those files. Pack and Go. You know, use these features in these programs so that it makes it easier.

Alright, so, it’s also important to note that you have a PLM system, and you do check-ins and check-outs. It’s going to be a little different because that software is going to manage a lot of what we’re talking about. So, I’m not . . . I not sure. I think it’s beyond the scope of this podcast to go in depth on . . . on the PLM systems. But, they’re great. They’re awesome. They help manage some of those. So, in this case, we’re just talking about the manual.

But, on the other hand, if you understand the manual, it makes it a lot easier to understand the PLM.

If you have any questions about this, please don’t hesitate to give me a call. I know it’s kind of a long section here and technical, but happy to entertain your calls, questions. It’s 1-800-722-7987. That’s Montie Roland. Email – montie (M-O-N-T-I-E)@montie(M-O-N-T-I-E).com. Or you can visit our website – www.montie.com. You can see the results of client work we’ve done at the montie.com website. Or you can see some of our projects that we’ve done for ourselves at montiegear (M-O-N-T-I-E-G-E-A-R).com.

I hope this has been beneficial. Montie Roland, signing out.
How to Set Up a New Project for Your Design and Engineering Team – Part 1

After many years of setting up projects for our industrial designers and mechanical engineers, here are my thoughts on some basic best practices on how to structure your files and keep your project organized.

Victor Sketching


Here is the transcript:

Good morning. My name is Montie Roland. I’m with Montie Design in Morrisville, North Carolina.

And this morning what I’d like to talk about is how to structure your project from a file standpoint, from an organizational standpoint.

Montie Design is a full-service design firm in Morrisville, North Carolina. We provide industrial design, mechanical engineering and prototyping capability on demand to help you move your project from concept to ready-for-the-shipping-dock.

It’s always good to have processes and procedures. Now, I think . . . and, of course, any company can take that too far. And the counterpoint is if you take it too far, then you get that big company mentality and you’re painful to deal with. But, a lot of these processes and procedures benefit the company. I’ll be the first to admit that, as we’ve grown, we’ve . . . I’ve not been the biggest proponent of procedure and process, because, as a small group, you get everybody reading your mind and you don’t have to worry about it. But . . . this changes as you have more employees, because you have different levels, different capabilities, you have to keep re-training. And so, all of a sudden, it’s more important to have policies and procedures just to make life easier for your staff.

It’s also important when you think about interns. You’ve got someone’s who’s going to be there for a limited amount of time. You want to get them in, get them trained, and get them some experience; and then also get some work product completed so it’s a win-win for both the employer and for the intern.

So, let’s just dive in. A lot of these topics I’ve covered in past podcasts were much more . . . higher level. And so, this case, though, I want to dive in and let’s talk about this in detail.

So, first thing is that when you think about how do you organize your files. You want to have a place that everybody can get to. So, let’s say . . . let’s call it the “Z-drive”. And on the Z-drive, you have a space that is a shared working space. Now, what you need is you need a set of rules so everybody knows what to do. On a project where there’s more than one contributor, you really want to have a gatekeeper. So, the gatekeeper is in charge of files that go in certain locations. One is that files that go in current design and the other is files that go in your release directories. So, let’s kind of roll through those directories so I don’t get too far ahead of myself.

So, we’ve got a project direction. Let’s say our project is Zigsess (spell that one). And so, we got the . . . so I created a directory in this case . . . maybe for the client Zigsess. And then I have to make a decision. Is it likely I’m going to have multiple projects from this client? Or is it likely that I might just have . . . one. Or, not now . . . So maybe what I’ll do . . . I’m thinking that this might be a repeat client. So, let’s say that, if it is, then I’m going to want to have a directory for each project that we do for that client. So, we’ve got a directory called “Clients”; and then the client name. And then underneath that, let’s say Project A is the Vertical Inductor. So, we create a directory called “Vertical Inductor”. Alright. And under Vertical Inductor, we’ve got several directories. And what we try to do is keep these file names the same so that it’s consistent for everybody. Otherwise, you run the risk of people not knowing where the correct file is, which could be really, really bad. Because if you don’t maintain control over where files are placed, then you end up with names like . . . “12 February ’04”; “13 February ’04”; “29 November”; or, “Latest”; “Latest Old”, “Latest New”. So, you can imagine that someone stepping in who isn’t the person who created those directories is not going to have a clue which is the correct set of files. Same thing for the person who created them comes back six months’ later, may go, “Ah . . . I don’t know.” And the scary part is you might grab the wrong files. Let’s say you grab the wrong files and made some parts. You just made some scrap metal, potentially. Or worse than that, it may take you a while to figure out what’s scrap metal and what’s not, and that may be more expensive than just doing the whole thing again. So, in order to avoid that entanglement, what we do is to have a directory called “Current Design”. Current Design is the working directory. After the project’s over, the files in Current Design, theoretically, should be the latest, but may or may not. So, then . . . while the projects active, Current Design should always have the up-to-date files. And that’s not necessarily released, but that’s the current working files. And by working files, it means the ones you’re working on; maybe if you just released and maybe those are the latest (same as the released). But if you’re between releases and your current design is your . . . is the directory that you’re using to pull files out of.

Now, once you get a lot of hands working on a project, it’s always good to have a gatekeeper. And the gatekeeper is the person that controls what goes in Current Design. So, he may have ten people providing files to him; then he turns around and puts those in Current Design.

We also have a directory called “Released”. Released contains files that have been released. And what released means is its gone out to the vendor. Because most of the time we’re operating in a development mode, our release policies may be a little different than your released policies in a large manufacturing facility. Or in any manufacturing facility. Because what we do is every time a drawing goes out to a vendor, we bump up the Rev. In absence of a specific revision policy, what we do is we go up by numbers. So, we’ve got a part number, and then the revision starts at 00; goes to 01, 02, 03, 04, 05. So, we can have a release at 07 or release at 12, a release at 99.

So, one of the things is I think it’s important to keep in mind is that your revision number structure is something that someone eventually picks. And as long as it works for you it just doesn’t matter. It just needs to be consistent. You can do A.1, A.2; we’ve seen that. You can do . . . a major release as A, a minor release is numerical. So, it could be A.01 or A01. We just think it’s easier just to use 01, 02, 03, 04.

Now, whenever we release a drawing to a vendor, or send it out to someone who . . . may use that to make a part, then, if we make changes to that drawing, we revise that drawing. If the change is very, very small, i.e., does not affect the final result that you get back (and maybe it’s not rev’d at that point) . . . so, for example, if you add a comma to a note that cannot possibly affect the outcome of the part (it’s just to fix some grammar), then maybe you don’t release that if you’re in the middle of development. At the end of a project, everybody has drawings; I’m sure you’ll need to rev that.

So, the release directory . . . so, we’ve got a directory called Released, under our Induction directory. And so then underneath that, we’ll have “Rev (R-E-V) 01”. And so that’s our first release, when we first send out drawings to someone, or to the client, call it Rev 01. The next time we have a release, we’ll call it “Rev 02”. It’s important to note that part numbers and assembly-drawn numbers may not necessarily align with this Rev 02, Rev 03; it just means it’s the next time we released a set of drawings. Now, it may (depending on the client, depending on the client’s needs) there is a possibility that we may rev the assembly to match the top level assembly to match that revision in the directory. It kind of depends on where we are on the development process. But that way you always know that here is the latest and greatest that we’ve sent out. The . . . Release directory also gives you a historical reference for what you’re working on. So, that way you can go back and look at earlier versions of files if you need to. Hopefully you never need to, but if you have a corrupted set of files, or something along those lines, you could.

We also create “Concept” directories. And that Concept directories will then have sub-directories underneath that indicating which part of the project. So, maybe if you did . . . sketches for the rear-mount, or the fascia, they might have separate directories. Usually we name concept sketches by date, which seems to work well, but that’s up to you. So, usually what we’ll do . . . so, we’ll do “2014 Sept 24 – “ and then the name of the concept . . . “Rounded Fascia Concept”, not PDF or what-have-you.

If you have any questions about this, please don’t hesitate to give me a call. It’s kind of a long section here and technical, but happy to entertain your calls, questions. It’s 1-800-722-7987. That’s Montie Roland. Email – montie (M-O-N-T-I-E)@montie(M-O-N-T-I-E).com. Or you can visit our website – www.montie.com. You can see the results of client work we’ve done at the montie.com website. Or you can see some of our projects that we’ve done for ourselves at montiegear (M-O-N-T-I-E-G-E-A-R).com.

I hope this has been beneficial. Montie Roland, signing out.
Simple Products plus a Great Back Story = Success

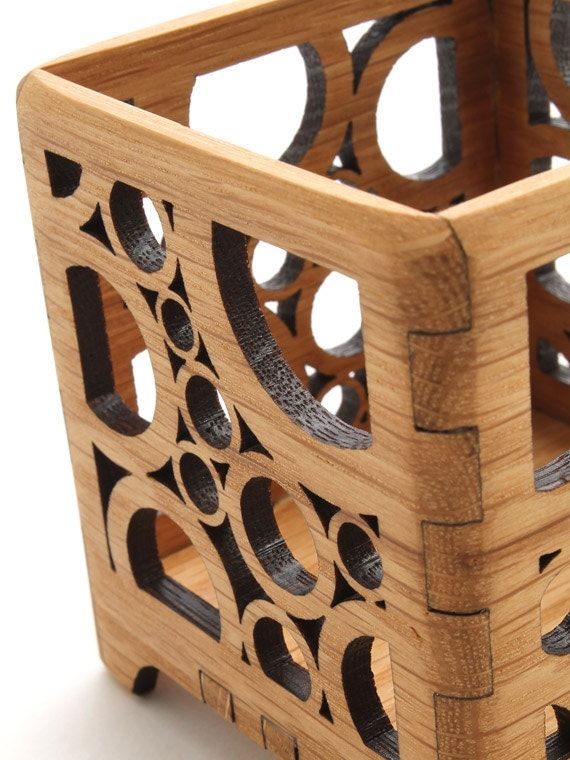
I was reading an email from Etsy this morning and thought I would pass it along.  Etsy is an online market place for handmade or crafty / artsy products.  One of their vendors is a company called Timber Green Woods.  I don’t know much about the company other than what I’ve read and by visiting their store on Etsy.  They have a line of simple (but well designed) wood products that they make from local timber.  The majority of the work is done using a laser to cut out the shapes.

Product from Timber Green Woods

When you think manufacturing, its easy to think everything has to be done in a giant building with a concrete floor.  However employees of Timber Green have parts of their day that look like this:


Using a portable saw mill to cut up the locally grown logs

These products are a great example of turning a local resource (the lumber) into a family of products without a tremendous amount of capital investment.  Then they used an online presence (with a lot of SEO work and wordsmithing) to grow their sales.  This is a wonderful formula where they made the use of the resources at hand and applied good design plus some innovative thinking to achieve success.

Here is the link to the story:  https://www.etsy.com/blog/en/2014/quit-your-day-job-timber-green-woods/

Let me know if Montie Design can help you apply our skills, drive and passion to help your product succeed!  Email montie@montie.com or call 800.722.7987


What Do World-Class Design and Profitability Have in Common? (continued)

Who made the decision to concentrate so much engineering and design effort on the door?  Who made the decision to concentrate effort on the handle and the blade, not just tweaking a centuries-old design?  In smaller companies, many of these decisions are not addressed by marketing and end up being shrugged off onto engineering.  The problem is that engineers are usually better at meeting specifications than prioritizing softer issues (such as look, feel and usability).  In larger companies, the bridge between marketing and engineering often comes in the form of an industrial design group.  In smaller companies the industrial design portion of the development process is often neglected.  The result is often products that are specification-centric instead of user-centric.

As demonstrated by the Oxo knives, user-centric products aren’t limited to high-end luxury products.  User-centric products tend to build loyal customer bases and repeat sales.  The key element in developing a user-centric product is to insert the task of industrial design into your design and development process.  Industrial designers take into account the various issues of function, form, available technology, manufacturing cost and users to synthesize a design.  The external appearance is only a small part of the industrial design process.  This is also the part of the design process where the vast majority of the product innovation occurs.  By looking at the product wholistically, the design team gets a glimpse of the entire life cycle of the product.  This is a step in the design process that has a tremendous amount of impact on the economical manufacturability of the product and the success of the product in the marketplace.  A well-executed initial product concept leads to drastically improved manufacturability and usability.

Today’s reality is that products are becoming more sophisticated.  Sophistication can come in many forms, such as advanced technology.  Sophistication can also come in the form of a more usable or more visually attractive design.  So even a technologically unsophisticated product can benefit from a more robust design process.  Making your products better and more successful may be easier than you think.  Investing in world-class design to ensure product profitability is key in a cautious economy.

Montie W. Roland is the President of Montie Design, a product development and industrial design firm headquartered in Morrisville, North Carolina.  Montie can be reached at 1-800-722-7987, www.montie.com, or montie@montie.com.