Podcast: Design Process Steps Funnel

Design Process Steps Funnel

[Transcript]
Audio File: 2014 Feb 25 – Design Process Steps Funnel.mp3
Audio Length: 12:01 minutes

Good Morning. My name is Montie Roland with Montie Design in Morrisville, North Carolina. I’m also with Montie Gear in Morrisville, North Carolina, as well.

Montie Design is a full-service product development firm. We provide everything from taking your concept all the way to a fully designed, fully engineered, ready-to-manufacture product, and helping you get that on the shipping dock. We can provide a value from the engineering side, from the industrial design side, to the project management aspect, and also from product validation, all the way to introducing you to contract manufacturers, and as-needed service liaison between your organization and the contract manufacture to make sure that it’s a win-win for everybody.

The design process has several steps. Those steps are intended to create a funnel. That funnel helps you to minimize the cost of the design process by starting out with a lot of ideas and a lot of concepts and boiling them down to the concept that is going to be the winner in the marketplace.

So, the next question becomes, well, how do you do that? So, if you use the funnel metaphor, with the funnel you’ve got a wide top. Let’s say you’re putting oil in your car. So you’ve got oil coming out of a jug, which is similar to the thought of ideas coming out of your staff, your constituents, your customers, and your stakeholders. And so, you pour that oil into that funnel, and the idea behind the funnel is you’ve got a big target. So all the oil you pour in starts running down the funnel. Well, the same thing; what we want to do is capture those great ideas, capture those concepts – written, verbal, unstated – capture those rules, because you know the design of your product has a lot of rules. And that’s because you’re in a market space where you have experience. So, as you put that experience to use, those rules have value because you don’t want to repeat any missteps in the past and you want to build on successes in the past.

So, what we do is the first step is to do research. There again, the research is akin to putting a second jug of oil in there. So we want to do research, understand what the market’s about. And then also make sure that we’re completely oriented to your market, and hopefully do a lot of the nuances of your market – some of that we have to rely on you; others, we can look at trends and research. So, that design research is the first step. And then the second step is to start pulling out concepts, thoughts, what we call “space shuttle ideas”, and do some ideation. And the initial ideation gets kind of everybody thinking, but I don’t want to pin any super solid concepts down yet; just get everybody thinking. And then what we want to do is do some brainstorming. So, now we’ve done some research, made a few sketches, enough to throw some stuff up on the wall and chew on it. And then we use brainstorming. And brainstorming is where there’s no such thing as a bad idea. Most people use a brainstorming session as a planning session; and it’s not. It’s a good way to ruin your brainstorming. Because some of the crazy ideas don’t work exactly as stated, but may lead to some really solid innovations. So, we brainstorm. Take that brainstorming results and then start doing ideation. Now, one of the steps that I just blew right by here as I was talking is we also want to create a style board. And we do want to do that in the beginning. That’s so that we can understand what you’re thinking. And a style board is to get your thoughts. With a style board, you bring us images, pictures, magazine clippings, polaroids; what have you. And show us things that you like. And, also, concepts that may be difficult for everybody to convey that doesn’t do this for a living, or just may be difficult to convey or it’s just a lot quicker with a photograph. For example, you may see a device on a piece of machinery. Take a picture, bring it to us, and say, I like how this device works; this could work great in our application. Or, I like the color; I like the shape; it could be the rear end of the Audi TT. Wow, these proportions are nice. So, we take that style board and we use that in our ideation. And we’ll also probably create one of our own. So, the brainstorming and the style board are very valuable tools.

Now, for some products, we need to do a personalities and personas session, where, kind of like a style board, we want to dig out a vision. So, with personalities and personas, we’ll design a product for an individual customer, and then we’ll go on to do this for a suite of customers that are very different – demographically, what they’re looking for, what they earn, who they are. You know, in some cases with some products we’ll throw in race and religion because there may be a cultural influence that we want to capture in our product development. And, yes, it’s important that you don’t design products for vanilla people, because vanilla people just don’t exist. So, what we have to do is look at the culture where our product’s going to be sold. If it’s a worldwide product, then we have to look at multiple cultures. What we don’t want to do is to create a product that won’t sell well in a given country because we’ve violated some cultural norm, and that’s really important.

So, then, we’re making sketches. We take those sketches and we review them. And it’s important to spend a lot of time looking and thinking about those initial sketches, because this is the inexpensive part of the project, relatively. Sketches are quick. So then we take those; we narrow a whole wall full of sketches down to a few concepts; work on those concepts. And the whole time we’ve been creating this design buffet. So what we want to do is create all of these concepts and all of these pieces, and then we can pick and choose from those pieces and some of those may integrate well together in the final product. So, there again, we’re starting out with a lot of ideas and then we’re narrowing it down as we go. So now we’ve got sketches of a bunch of ideas; we’ve narrowed that down to, say, one, two or three; and then we take those and refine those. And then we do a review again. Then narrow that down. So, the whole time, everybody’s getting a chance to provide input. If possible, we want to create a massing model. A massing model is a simple prototype that just reflects size and shape – simple, inexpensive, quick, you know, blue foam type prototype. Not something you show to the CEO unless he’s really hands-on. But something you can pass around between the product manager and the engineers and just in a, kind of, a closed circle of review.

And then we take that and narrow it down to one concept. Take that one concept and refine that concept. Get it signed-off. So, everybody needs to sign off, all the stakeholders, that this is the concept we want to move forward with. We take that concept and we go to the engineering stage. In the engineering stage we work out the nuts, the bolts, where everything goes. It’s important during the engineering stage to maintain the vision so that the engineers don’t lose track of what’s the aesthetic vision, what are the values, the, you know, it’s not just a collection of specs and bolts and nuts; it’s a product for a living, breathing people.

Somewhere in that stage we want to build a prototype. We want to build prototypes as soon as possible and as often as possible. So, once we have an industrial design concept and we’re starting to commit this to a solid model, a lot of times its good to build a cruder prototype, but one that’s actual size that may have some of the functionality as we’re going through the engineering process. At the end of the engineering process we want to build a functional prototype; maybe even an alpha unit. We’ve made drawings; we’ve gone out for quotes, created a bill of materials. As early in the process we want to start our bill of materials so that we’re starting to get an idea of what this is going to cost in production. From there, we transition to manufacturing. Make those introductions – Who’s going to make your product? Are you going to assemble it yourself? Is it going to come in a box, ready to go, from a contract manufacturer? We got to think about packaging. We may need to design you some packaging. Got to think about – Is it shipped over the Internet? Or is this a point-of-sale type product, where we need to have point-of-sale packaging?

And so we work through these issues and these challenges and opportunities, and create for you this product. And those are, in a nutshell, the basic steps. If you’re a Fortune 100 company, or an entrepreneur that’s selling your second product, you’re going to follow the same steps – maybe not as formally, but in general – you’re going to follow those same steps. As you can imagine, a change on a sketch early on is inexpensive; a change after you’ve fully engineered the product gets more expensive; and a change after you’ve started producing it is painful. So, what we want to do is pull out that vision; we want to get the stakeholders to weigh in, make sure that important parts of the product and those aspects are fully realized; and we don’t trip over something. Like, for example, an unknown requirement. So, by going through these steps, we minimize the risk of that unknown requirement popping up. And that’s one of the reasons you want to prototype early because usually when you lay something on the table, some of those unstated, understated or just not known products requirements start coming out.

So I hope this has been helpful. If you have any questions, don’t hesitate to give me a call – 1-800-722-7987. It’s Montie Roland. Or, montie (M-O-N-T-I-E)@montie(M-O-N-T-I-E).com. Or www.montie (M-O-N-T-I-E) .com is our website.

I hope you have a great day. I hope this is beneficial. Montie Roland, signing off.

END AUDIO

How to Design Successful Outdoor Products

Designing any great product is easier when the designer and engineers to have an appreciation for how they are making the customer, reseller and distributor’s life easier and more profitable.  This podcast explores how I was motivated to design products for the camping / glamping market.  We’ll also explore what it means to have a robust product.

Call me at 800.722.7987 or email montie@montie.com or visit montie.com to discuss how we can help with the design, engineering and prototyping of your next product.

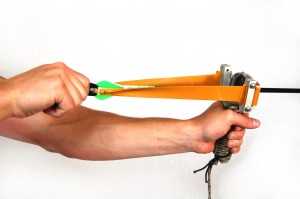
Montie Gear Y-Shot Slingshot shooting a break down arrow
Montie Gear Y-Shot Slingshot

Here is the transcript from the podcast.

Hi, my name is Montie Roland. I’m with Montie Design in Morrisville, North Carolina.

I’d like to spend a few minutes today talking about keys to success in designing an outdoor product.

Let me tell you a little bit about what we do. Montie Design is a product development firm. And we’re also the manufacturers of MontieGear line, which is a line of outdoor and shooting-related products.

I personally enjoy designing products of all kinds. One of the products I enjoy the most is products that are outdoor related. I enjoy spending time in the outdoors – enjoy camping, enjoy backpacking – so I’m always trying to come up with, you know, what’s a way to make that trip more pleasurable, safer, easier. Or what’s a way to extend the capacity and do something better.

I think a lot of us have spent time camping. A lot of times, when we’re growing up, maybe going car camping . . . maybe you just went once or twice. Maybe it was with Indian Princesses or with Boy Scouts or Girl Scouts. But being outdoors, there’s a certain freedom and there’s a certain . . . lack of captivity then you are when you’re between four walls. Now the trade-off is that you got to work a little harder. It’s . . . not as comfortable, sometimes. You’re out of your comfort zone. You don’t have some of the comforts of home. And so . . . equipment over the past few years has changed in some ways; in some ways it’s very similar. When you’re camping, you want to be comfortable. You know, one of the horror stories you see on the commercials and on TV (and maybe experienced) is getting wet. You know . . . my daughters and I were camping in the Shenandoah’s a few years ago, and Hurricane Bob came through. We had no idea which way that hurricane was going to go. And we had planned this grip in advance and we finally said, Hey, let’s just go. And worst case? We’ll just drive home. And so we were up in the Shenandoah’s and . . . it rained. And . . . and then the tropical storm actually passed over. And it rained. And, did I mention it rained? Yeah. And in between the rain, there was rain. So, needless to say it was a challenging environment for about . . . I don’t know – twenty-four hours? When it rained for twenty-four hours. Did I mention the cooking in the rain? Or no . . . yeah.

But, anyway, so our tent wasn’t up to the challenge. Now, thankfully, our Aerobed was. So, late that evening, our tent in one corner had about two foot of water in it. And the average depth in the tent was probably six inches. Now, we were car camping, and thankfully, we had put everything in boxes, these waterproof . . . or, pseudo-waterproof boxes, because we had stuff in the truck. So, we had the bed full of camping gear. And . . . so when it rained and tent flooded, we . . . we were laying on the Aerobed, and the Aerobed was floating. Our boxes were floating. So, if you wanted something out of a box, you had to reach over and grab it, pull you to it, take the lid off without tipping it over and bringing water in. Also had to be real careful not to let your sleeping bag fall off the Aerobed, because if you did, it was wet.

So, it was definitely challenging in that way. I think that we still had a good time. Have to ask my daughters. I might be being optimistic. But . . . so in that case, the product didn’t live up to the challenge. I ended up taking the tent back.

So, when you’re outdoors, one of the things you want to provide with your products is you want to enhance the comfort of the trip, if you can. Now, the product may itself enhance the comfort. So, let’s say you’ve got an inflatable mattress, making sleeping more comfortable. That is so nice when you’re camping. But at the same time, I think it’s important to also think about how the product’s carried, how it’s stored, how it’s used. So, for example, you may enhance the comfort of the trip by making an existing product easier to carry. So, for example, if something’s big and bulky and takes up too much room in the car, or in your pack, then you may find that it’s really uncomfortable. Or, let’s say that for some reason it pokes you in the back in your backpack; when it’s in the backpack, its poking you in the back. Or it’s causing some sort of other transportation dilemma. So, how the product is carried, how it packs, how easy it is to pack – those are all things that can help make your trip more comfortable in that respect. And also, less work. One of the things with our Montie Gear products that we push is to have products that are very, very easy to assemble. Because when you’re tired, it’s raining, its dark, its cold, the last thing you want is to have a product that’s overly complex and difficult to assemble. Because once that happens, those conditions amplify the difficulty of using it, assembling it, breaking camp, what have you. And you’ve lowered the user’s perception of the product, possibly to the point they’re done with it.

So, you always want products that are easy to assemble, easy to use. Just because something’s that easy to assemble on your desk at work, when you’re sitting in a comfortable chair and not hungry, not tired, no rain, seventy-two degrees . . . you may be able to do it on your desk and go, Well, that’s not so bad. But then once you get outside, in the outside environment, looking for twelve pieces that you just dropped onto the ground and now found out that the color they are is perfectly camouflaged – those all add aggravation. So, you want to have products that are low aggravation. And generally, readying the product for use – assembly, what have you – is an area where we’ve seen a lot of . . . I have personally when I was camping seen a need to really think through the product. So, you want a product that’s comfortable; you want a product that easy to assemble, easy to bring to bear, easy to stand up. We want a product that is easy to use. There again, if you’re sitting by the fire and its dark, having some precision alignment of holes before you can put something in a pin, before you can, you know, use it; maybe you have to take it apart between uses and put it back together. Well, if it’s difficult to do in the dark, there again, you may have a product that just doesn’t fit that environment.

So, that . . . that goes to the issue of being robust. Robust products are easy to use, easy to assemble, and hard to damage. And give you . . . also, I will argue that a truly robust product gives you ways that you can use it in ways that the designer never intended. So, maybe there’s a “I intended to do ‘A’”; your customer does “B”. At that point, that’s a really valuable piece of feedback to know because that may open up a whole new market for you. Or, give you an idea of a new product you should design.

So, robust products are ones that they are just easy to use, hard to damage, and easy to assemble, easy to take down, and give you options. Sometimes you can do stuff twelve different ways. Sometimes it’s one, depending on the product.

So, the other thing is you want products that are rugged when you’re designing for the outdoors. Now, sometimes you have limits on that, how rugged they are. A great example is a tent pole. Tent poles, by nature, tend to be fragile to keep weight down, especially with backpacking tents. So there’s this implicating understood trade-off that when I lay out my tent poles from my backpacking tent on the ground, I don’t want anybody around because I don’t want anybody to step on it and bend it or break it. And so I understand that the trade-off of having a four-pound-ten-ounce tent is the fact that the poles are delicate until they’re assembled. Now, they’re easy to assemble with a shock-cord and so forth. But until they get into the tent, they . . . can be hard to . . . can be delicate. Now, once they’re on the tent, they need to be extremely robust. That fifty-mile-an-hour wind, or that six inches of snow, that tent needs to come through that, and that pole needs to do its job with no problems what so ever.

So, there are times when the rugged nature and the robust nature has to be within a specific pattern of use, or a specific part of a pattern of use. And I think the other thing that’s important when you’re camping is that you want a product that looks like it should be a product when you’re camping. Now, one of the things that has changed about this is that for a long time camping products were very functional. They looked like something that you’d buy at the Army Navy Store. A good example is Coleman stove. A white gas later gave way to propane. But, they’re great, they’re rugged; you can fix them with a . . . a knife and a screwdriver, some oil; and they’re just great products – they last forever. And I think long life is usually a by-product of having something that’s rugged and something that’s robust. So, a lot of these cots and other things just look like something the military would use. Now, what happened a few years ago is REI came on the scene, a great outdoor provisioning company. And all of a sudden, camping became more upscale. And so as these stores competed for dollars, one of the ways that they made themselves more distinctive was to provide very high quality, very robust products, and provide them at a higher cost, because higher quality robust, what have you . . . and that also gave the opportunity and the need for more industrial design. Where thinking through the customer experience, the customer experience behind the counter, or in front of the counter; customer experience in the field; what the customer sees on the website; reviews; what have you. So, the world kind of changed and now we have camping products that a lot of times are beautiful as well as tough.

And so, with a camping product, you got to also . . . you know, where does it fall? Is it an inexpensive product? And Coleman is an expert at providing relatively inexpensive, less frills, less performance products. Or, is it a product that is a higher quality product and a higher end product (something you might see at REI)? And then in the past few years, there’s also been a switch to what I’m going to call “Glamping” products. And I think glamping . . . which another way to look at it is called “glamorous camping”. It’s something we can thank the Europeans for. And we were headed there anyway. But, in Europe, you can go camping at a campground and camp in a two thousand square foot tent with flat screen TVs, satellite cable, Persian rugs, couches, that are really, basically, high-end homes made out of fabric. And so the option of doing glamping, I think, is starting to come to the U.S., and that’s going to impact some of the products that are designed for this market as well. So, just to keep that in mind, you’ve kind of got a low-to-midrange, which is the Coleman products; a lot of products that folks who own RVs buy; and then the mid-range . . . mid-low-or-high, which is REI – so you’ve got brands like Patagonia, you know; Merrill. And then you’ve got high end, the glamping products. And that kind of gives you, hopefully, gives you a framework of where to start when you have to look at how you’re going to structure this product. Where does it live? And, also, to evaluate whether or not you’ve got the right product designed. How effective it’ll be in the marketplace.

So, these are some criteria. Just to summarize. You want a product that’s rugged. You want a product that’s robust. You want a product that’s high quality. You want a product that fits the intended market segment, be it the lower end (the Coleman, a lot of the RV products), the mid-range (the REIs and Great Out Door Provision Company-type market); or the glamping market. You want a product that’s easy to use, easy to assemble. You want a product that’s easy to assemble when it’s almost dark and raining and cold. You know, can you assemble this product with gloves? Is this a product where once it’s . . . it’s hard to damage once it’s installed, but is easy to install. So, in camping, it’s a very tough market because it’s so functionally driven and so user experience driven. And then also, too, yeah, always keep in mind is that you’ve got different types of camping. You’ve got car camping. You’ve got glamping. And, of course, car camping being you drive your car to up to where you’re going to camp; you unload everything. So, weight and size isn’t so much of a penalty; comfort’s a high priority. Backpacking – weight is everything. Comfort – eh, not so much so. And ruggedness in backpacking is very important, but you have a more sophisticated user that understands that you don’t want to bend that tent pole when you’re twenty miles from anywhere.

So, keeping all those in mind, I hope you design some great outdoor products. If you have a product that you need . . . maybe you’ve got a concept and need us to design an product and then build a prototype and help you get it into manufacturing, or just some small part of that, give me a call, we’d love to help.

Montie Roland, Montie Design, 1-800-722-7987. Or montie (M-O-N-T-I-E)@montie(M-O-N-T-I-E).com. I hope you have a great day. I hope this podcast was beneficial for you. Montie Roland, signing off.

How to Set Up a New Project – Pack and Go’s – Part 2

After many years of setting up projects for our industrial designers and mechanical engineers, here are my thoughts on some basic best practices on how to structure your files and keep your project organized.  We’ll concentrate on the importance of Pack-and-Go’s in this segment.  This is a very important set of practices that will help keep you out of trouble.  These concepts are important even if you have a PLM system, because it helps you understand how the PLM helps keep you organized.


Solidworks Pack and Go for TutorialHere is the transcript:

Good morning. My name is Montie Roland. I’m with Montie Design in Morrisville, North Carolina.

And this morning what’d I’d like to talk about is how to structure your project from a file standpoint, from an organizational standpoint.

Montie Design is a full-service design firm in Morrisville, North Carolina. We provide industrial design, mechanical engineering and prototyping capability on-demand to help you move your project from concept to ready-for-the-shipping-dock.

The Concept directories are where you’ll store your sketches, your ideations, maybe your solid model concepts, pictures for your style board. So then, when you think about these files we’re starting to store, you really have two types of files. One type of file is parametric, and the other type of file is static. And then really . . . I guess a third file would be like a . . . a file that’s directly editable. When it comes to Cat files, though, we have two types.

So, parametric files are files that are linked or potentially linked to other files. This is very, very important to keep in mind. So, with Solid Works, we can save a non-parametric file to a format like STEP or DXF or IGES or DWG or PDF. These non-parametric files can be edited, like, easily in the case of DXF or DWG; less easily in the case of PDF. And so these files, though, are generally not going to change just because you changed something somewhere else in the Solid Works model. However, the Solid Works files from Solid Works are parametrically linked in many cases. So, for example, a drawing file is going to go reference the part file to rebuild the drawing. So, if the part file is missing, it can’t reference it and can’t rebuild drawing and get a, basically, a blank screen in the middle of your . . . your drawing. So this is very, very important to keep in mind. Whenever you move files from one directory to the other (and occasionally you need to do this anyway), you run the risk of orphaning a file that’s somewhere else. So a good example of this is . . . let’s say I’m working on (in Solid Works) and I got to McMaster Car and I download a screw (which is a great way to get a screw). So, I download that screw and then I open it up; it comes across as a STEP or an IGES, and then I import it into my model. And when I hit “save” that McMaster Car Screw was saved to my download directory on my local machine. So, if I don’t consciously save that to my Current Design file . . . Current Design directory on the server, then . . . or on the Z-drive, then what’s going to happen is that now I have files in two different places. So, if I was to go and grab Current Design and move it into Release, let’s say. Just copy it over. I would leave that screw behind. Because the copy tool in Windows Explorer does not know about the relationships in Solid Works. So, it doesn’t know to go grab that.

Solid Works has this wonderful utility called “Pack and Go”. Pack and Go finds every file that’s linked to the files that you have open. So, what you want to do is go to the top level of, let’s say, Drawing. Or top-level Assembly. Open up Pack and Go, and then it’ll give you some options. And, generally, you want to exercise all those options in terms of including drawings, including . . . textures, including decals, FEA results; grabbing all that’s good – that way you don’t leave something behind. Solid Works will go look for those files, make a list of them, let you see that list, and then you pick a location where you either want to save that as a zip file, or you want to save that . . . just to that directory; drop the files in that directory. So, you choose that directory and then you hit “Okay”. Then Solid Works will think, and then it will start grabbing files and copying them to that directory. If you do not do this, it will bite you. It is not a question of if it will bite, it’s a question of what moment, what day, and how bad. Because we’ve seen this before. You can imagine that if you have files on a local machine and you just copy them over, or you copy them between places on the Z-drive or what have you, and you orphan some of these files, it can be very painful to find those, get those back. And then you’re never really sure you have the right one. So, let’s say you orphan a single screw. Okay. Worse case, you go download it from McMaster again. But let’s say that you have somehow ended up with a part file that’s in an unknown Rev (or even if we know what the Rev should be) and maybe it’s in some directory. It can very easily happen that you inadvertently saved it to the wrong directory. So, maybe you’re working in Current Design but you’re using a file from Rev 02. But that file is actually Rev 07. So, you grab the stuff out of Current Design, move it to Rev 08. You missed the Rev 07 file. Well, now, all of a sudden, we’ve got no clue where to find that file. And it’s difficult to find without pulling up every single file in . . . on the . . . in the subdirectory on the Z-drive and on your machine, and try to figure out which one it is. And even then, we’ve got to go by the Revision number and properties. And that’s just painful because that still doesn’t tell us it’s the right one. Because there could be, like, a 7 there and an 07 here and which one’s the correct one.

If you do Pack and Go, you avoid soooooo much of that trouble. It’s . . . Pack and Go is your friend. I just . . . this is one of those things that’s important to emphasize.

So, a similar thing applies to other programs. For example, PowerPoint has a Pack and Go feature; use it. Grab all of these images, put them in a Pack and Go file, because that . . . most of the time when you’re working on projects, you end up with images in different subdirectories. It’s on a local machine. It’s on a . . . it’s on your network. But if you do Pack and Go it grabs all those and puts them in the same space. Yes, you use more disk space. I’ll argue that disk space is dirt cheap compared to a few hours of looking for a file you can’t find ten minutes before your deadline.

The same goes for . . . you know, you’re working in an Adobe product. If you have the option to embed it in the file rather than link to it – embed it in the file. I realize this can make your . . . catalog a gigabyte in size. But, it’s so much better than two months’ later pulling it up and missing files. There again, disk space is cheap; time’s not. So, embed those files. Pack and Go. You know, use these features in these programs so that it makes it easier.

Alright, so, it’s also important to note that you have a PLM system, and you do check-ins and check-outs. It’s going to be a little different because that software is going to manage a lot of what we’re talking about. So, I’m not . . . I not sure. I think it’s beyond the scope of this podcast to go in depth on . . . on the PLM systems. But, they’re great. They’re awesome. They help manage some of those. So, in this case, we’re just talking about the manual.

But, on the other hand, if you understand the manual, it makes it a lot easier to understand the PLM.

If you have any questions about this, please don’t hesitate to give me a call. I know it’s kind of a long section here and technical, but happy to entertain your calls, questions. It’s 1-800-722-7987. That’s Montie Roland. Email – montie (M-O-N-T-I-E)@montie(M-O-N-T-I-E).com. Or you can visit our website – www.montie.com. You can see the results of client work we’ve done at the montie.com website. Or you can see some of our projects that we’ve done for ourselves at montiegear (M-O-N-T-I-E-G-E-A-R).com.

I hope this has been beneficial. Montie Roland, signing out.

How to Set Up a New Project for Your Design and Engineering Team – Part 1

After many years of setting up projects for our industrial designers and mechanical engineers, here are my thoughts on some basic best practices on how to structure your files and keep your project organized.

Victor Sketching


Here is the transcript:

Good morning. My name is Montie Roland. I’m with Montie Design in Morrisville, North Carolina.

And this morning what I’d like to talk about is how to structure your project from a file standpoint, from an organizational standpoint.

Montie Design is a full-service design firm in Morrisville, North Carolina. We provide industrial design, mechanical engineering and prototyping capability on demand to help you move your project from concept to ready-for-the-shipping-dock.

It’s always good to have processes and procedures. Now, I think . . . and, of course, any company can take that too far. And the counterpoint is if you take it too far, then you get that big company mentality and you’re painful to deal with. But, a lot of these processes and procedures benefit the company. I’ll be the first to admit that, as we’ve grown, we’ve . . . I’ve not been the biggest proponent of procedure and process, because, as a small group, you get everybody reading your mind and you don’t have to worry about it. But . . . this changes as you have more employees, because you have different levels, different capabilities, you have to keep re-training. And so, all of a sudden, it’s more important to have policies and procedures just to make life easier for your staff.

It’s also important when you think about interns. You’ve got someone’s who’s going to be there for a limited amount of time. You want to get them in, get them trained, and get them some experience; and then also get some work product completed so it’s a win-win for both the employer and for the intern.

So, let’s just dive in. A lot of these topics I’ve covered in past podcasts were much more . . . higher level. And so, this case, though, I want to dive in and let’s talk about this in detail.

So, first thing is that when you think about how do you organize your files. You want to have a place that everybody can get to. So, let’s say . . . let’s call it the “Z-drive”. And on the Z-drive, you have a space that is a shared working space. Now, what you need is you need a set of rules so everybody knows what to do. On a project where there’s more than one contributor, you really want to have a gatekeeper. So, the gatekeeper is in charge of files that go in certain locations. One is that files that go in current design and the other is files that go in your release directories. So, let’s kind of roll through those directories so I don’t get too far ahead of myself.

So, we’ve got a project direction. Let’s say our project is Zigsess (spell that one). And so, we got the . . . so I created a directory in this case . . . maybe for the client Zigsess. And then I have to make a decision. Is it likely I’m going to have multiple projects from this client? Or is it likely that I might just have . . . one. Or, not now . . . So maybe what I’ll do . . . I’m thinking that this might be a repeat client. So, let’s say that, if it is, then I’m going to want to have a directory for each project that we do for that client. So, we’ve got a directory called “Clients”; and then the client name. And then underneath that, let’s say Project A is the Vertical Inductor. So, we create a directory called “Vertical Inductor”. Alright. And under Vertical Inductor, we’ve got several directories. And what we try to do is keep these file names the same so that it’s consistent for everybody. Otherwise, you run the risk of people not knowing where the correct file is, which could be really, really bad. Because if you don’t maintain control over where files are placed, then you end up with names like . . . “12 February ’04”; “13 February ’04”; “29 November”; or, “Latest”; “Latest Old”, “Latest New”. So, you can imagine that someone stepping in who isn’t the person who created those directories is not going to have a clue which is the correct set of files. Same thing for the person who created them comes back six months’ later, may go, “Ah . . . I don’t know.” And the scary part is you might grab the wrong files. Let’s say you grab the wrong files and made some parts. You just made some scrap metal, potentially. Or worse than that, it may take you a while to figure out what’s scrap metal and what’s not, and that may be more expensive than just doing the whole thing again. So, in order to avoid that entanglement, what we do is to have a directory called “Current Design”. Current Design is the working directory. After the project’s over, the files in Current Design, theoretically, should be the latest, but may or may not. So, then . . . while the projects active, Current Design should always have the up-to-date files. And that’s not necessarily released, but that’s the current working files. And by working files, it means the ones you’re working on; maybe if you just released and maybe those are the latest (same as the released). But if you’re between releases and your current design is your . . . is the directory that you’re using to pull files out of.

Now, once you get a lot of hands working on a project, it’s always good to have a gatekeeper. And the gatekeeper is the person that controls what goes in Current Design. So, he may have ten people providing files to him; then he turns around and puts those in Current Design.

We also have a directory called “Released”. Released contains files that have been released. And what released means is its gone out to the vendor. Because most of the time we’re operating in a development mode, our release policies may be a little different than your released policies in a large manufacturing facility. Or in any manufacturing facility. Because what we do is every time a drawing goes out to a vendor, we bump up the Rev. In absence of a specific revision policy, what we do is we go up by numbers. So, we’ve got a part number, and then the revision starts at 00; goes to 01, 02, 03, 04, 05. So, we can have a release at 07 or release at 12, a release at 99.

So, one of the things is I think it’s important to keep in mind is that your revision number structure is something that someone eventually picks. And as long as it works for you it just doesn’t matter. It just needs to be consistent. You can do A.1, A.2; we’ve seen that. You can do . . . a major release as A, a minor release is numerical. So, it could be A.01 or A01. We just think it’s easier just to use 01, 02, 03, 04.

Now, whenever we release a drawing to a vendor, or send it out to someone who . . . may use that to make a part, then, if we make changes to that drawing, we revise that drawing. If the change is very, very small, i.e., does not affect the final result that you get back (and maybe it’s not rev’d at that point) . . . so, for example, if you add a comma to a note that cannot possibly affect the outcome of the part (it’s just to fix some grammar), then maybe you don’t release that if you’re in the middle of development. At the end of a project, everybody has drawings; I’m sure you’ll need to rev that.

So, the release directory . . . so, we’ve got a directory called Released, under our Induction directory. And so then underneath that, we’ll have “Rev (R-E-V) 01”. And so that’s our first release, when we first send out drawings to someone, or to the client, call it Rev 01. The next time we have a release, we’ll call it “Rev 02”. It’s important to note that part numbers and assembly-drawn numbers may not necessarily align with this Rev 02, Rev 03; it just means it’s the next time we released a set of drawings. Now, it may (depending on the client, depending on the client’s needs) there is a possibility that we may rev the assembly to match the top level assembly to match that revision in the directory. It kind of depends on where we are on the development process. But that way you always know that here is the latest and greatest that we’ve sent out. The . . . Release directory also gives you a historical reference for what you’re working on. So, that way you can go back and look at earlier versions of files if you need to. Hopefully you never need to, but if you have a corrupted set of files, or something along those lines, you could.

We also create “Concept” directories. And that Concept directories will then have sub-directories underneath that indicating which part of the project. So, maybe if you did . . . sketches for the rear-mount, or the fascia, they might have separate directories. Usually we name concept sketches by date, which seems to work well, but that’s up to you. So, usually what we’ll do . . . so, we’ll do “2014 Sept 24 – “ and then the name of the concept . . . “Rounded Fascia Concept”, not PDF or what-have-you.

If you have any questions about this, please don’t hesitate to give me a call. It’s kind of a long section here and technical, but happy to entertain your calls, questions. It’s 1-800-722-7987. That’s Montie Roland. Email – montie (M-O-N-T-I-E)@montie(M-O-N-T-I-E).com. Or you can visit our website – www.montie.com. You can see the results of client work we’ve done at the montie.com website. Or you can see some of our projects that we’ve done for ourselves at montiegear (M-O-N-T-I-E-G-E-A-R).com.

I hope this has been beneficial. Montie Roland, signing out.